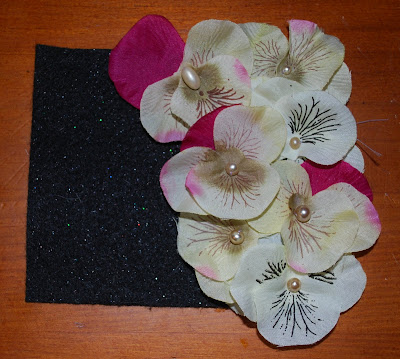
This is a simple DIY for a beautiful tie on head band.
Items Needed:
Needle
Thread
Beads
Fake Flowers ( I got mine from the Dollar Store)
Ribbon
Felt ( mine is sparkly)
Glue Gun (not pictured)
Pins(not pictured)
~~~~~~~~~
Step 1
The length of the ribbon depends on your head. You basically need enough to wrap around your head and tie into a bow. Then length I needed was 62".... which is almost as long as I am tall. I wanted a lot of extra ribbon after I tied it on.
Cut a square piece of felt. How big depends on how big you wish your flower piece to be. I cut out a 4x4" and I honestly did not know what this headband looked like until I pieced it together.
~~~~~~~~~~~~~~~
Step 2:
There is not clear formula on how to put the flowers together. Put your first flower down and using your needle and thread, attach it to the felt. Sew the bead in the middle to secure the flower and then move onto the next flower.
The sewing does not need to be perfect. As you can see I'm all over the place.
~~~~~~~~~~~~~
Step 3:
Once you have all the flowers you desire on your felt turn it over and attach the ribbon. You will want to first figure out where you want your ribbon to lie. Test the placement out by pinning the ribbon to the felt and in front of the mirror tie on the headband and adjust accordingly.
Once you have found the perfect place, loosely sew the ribbon to the felt.
~~~~~~~~~~
Step 4:
Any excess felt you have at this point fold over onto of the back of your piece.
Any pieces sticking out in the front, cut off.
Using your glue gun, glue the excess to the back of your piece. If you do not have any excess, cut out a similar shape of felt as your piece and glue together. This way it will protect your stitches, secure the ribbon and look nice.
~~~~~~~~~~~~
Step 5 (Optional):
I could never stand tie on headbands because they would always move and securing them with bobby pins did not help! Here is a little tip that helps A LOT to keep your head bands in place.
Using your glue gun, glue down lines of glue on the back of your flower piece and let dry. The texture of the glue will help keep the hair band in place. I tried this out on this head for the first time. I wore it to work and did not have to adjust the piece at all. You can also add glue throughout the ribbon to help keep that in place as well, but since I used a lace ribbon I did not try that out. Maybe next time.
~~~~~~
All Done!
Just a few simple items to make an elegant headband.
I wore this to work and got tons of compliments. I tend to try out my DIYs on my co-workers, they help with feed back.
Enjoy! Remember: Have Fun, Don't Stress, and Make it Your Own!
30 Day Song Challenge: Day 11 - A song from your favorite group.
2NE1 Of course!!!!!
I choose this song, because I think this is one of the only songs I have not yet posted on this blog! 2NE1 Rocks!
<3 Zerila


No comments:
Post a Comment