Showing posts with label Buttons. Show all posts

Thursday, June 2, 2011

Blogging Day 284: Hello Kitty XBox 360


For my birthday I got an Xbox 360 along with 'Dragon Age 2'.


Xbox 360 4GB Console

Dragon Age 2


Our old Xbox 360 broke and while breaking damaged my old DA2.

FYI, my romantic interest  in DA2 is Fernis.


Why? Why not. Emo guys do it for me ;op


Anyway, this is the first time I have gotten a console. Usually I wait it out and  get my brothers to spend all their money. I'm sneaky like that.

I decided since this is MY XBox 360, I'm going to girlify it.

I went and grabbed all girly things I could attach to my Xbox.

This is what I found:


Of course I couldn't use everything, but I didn't have a true plan in mind yet. The possiblities were endless.

This is what I came up with:


The front I kept simple. Just a few pink sparkles and a sticker. This gems had little stickies on the back, so need for glue here.

Now for the top:


I tried so hard to get a good picture of the Hello Kitty, but it was so hard since the words were so shiny. The Hello Kitty decoration is from the box that had the 100 point gift from Sephora I got and showed everyone on Blogging Day 172. I kept the box because I thought it was so cool and I knew I would do something with it!

Most of the gems had stickies on the back, but the ones that didn't I used super glue.  The two big round glitter pink circles boarding the Hello Kitty, are actually buttons. I cut off the backs and glued them on! Buttons can be used on ANYTHING!!!

Note to self: find a different glue besides super glue. When it drys it turns white and it looks messy. Anyone have any suggestions?

Either way I had alot of fun! I bling-blinged my Xbox 360, and made it my own! Sometimes I feel the gaming companies do not give us girls enough in variety. Of course, making my own variety is always better.

Also, I marked my controller too! No guess work on who this one belongs too!


I used the skull and sneaker because I kick butt and bring death to evil doers with this controller. :D Watch out Zombies!!

Of course, I just went up stairs and saw my communist brother using my controller. He states that he is very secure in his man hood and has no problem playing with a pink controller....grrr...

<3 Zerila

Water- Good, but with the heat being so bad today I think I should have had more.
Veggies- Tomatoes, carrots and broccoli.  I had fresh carrots, not yucky old soap tasting ones. Real baby carrots, because Make sure they are real baby carrots.


Tuesday, May 17, 2011

Blogging Day 269: Button Earrings DIY


I made these simple post earrings using buttons!
Let's Begin!


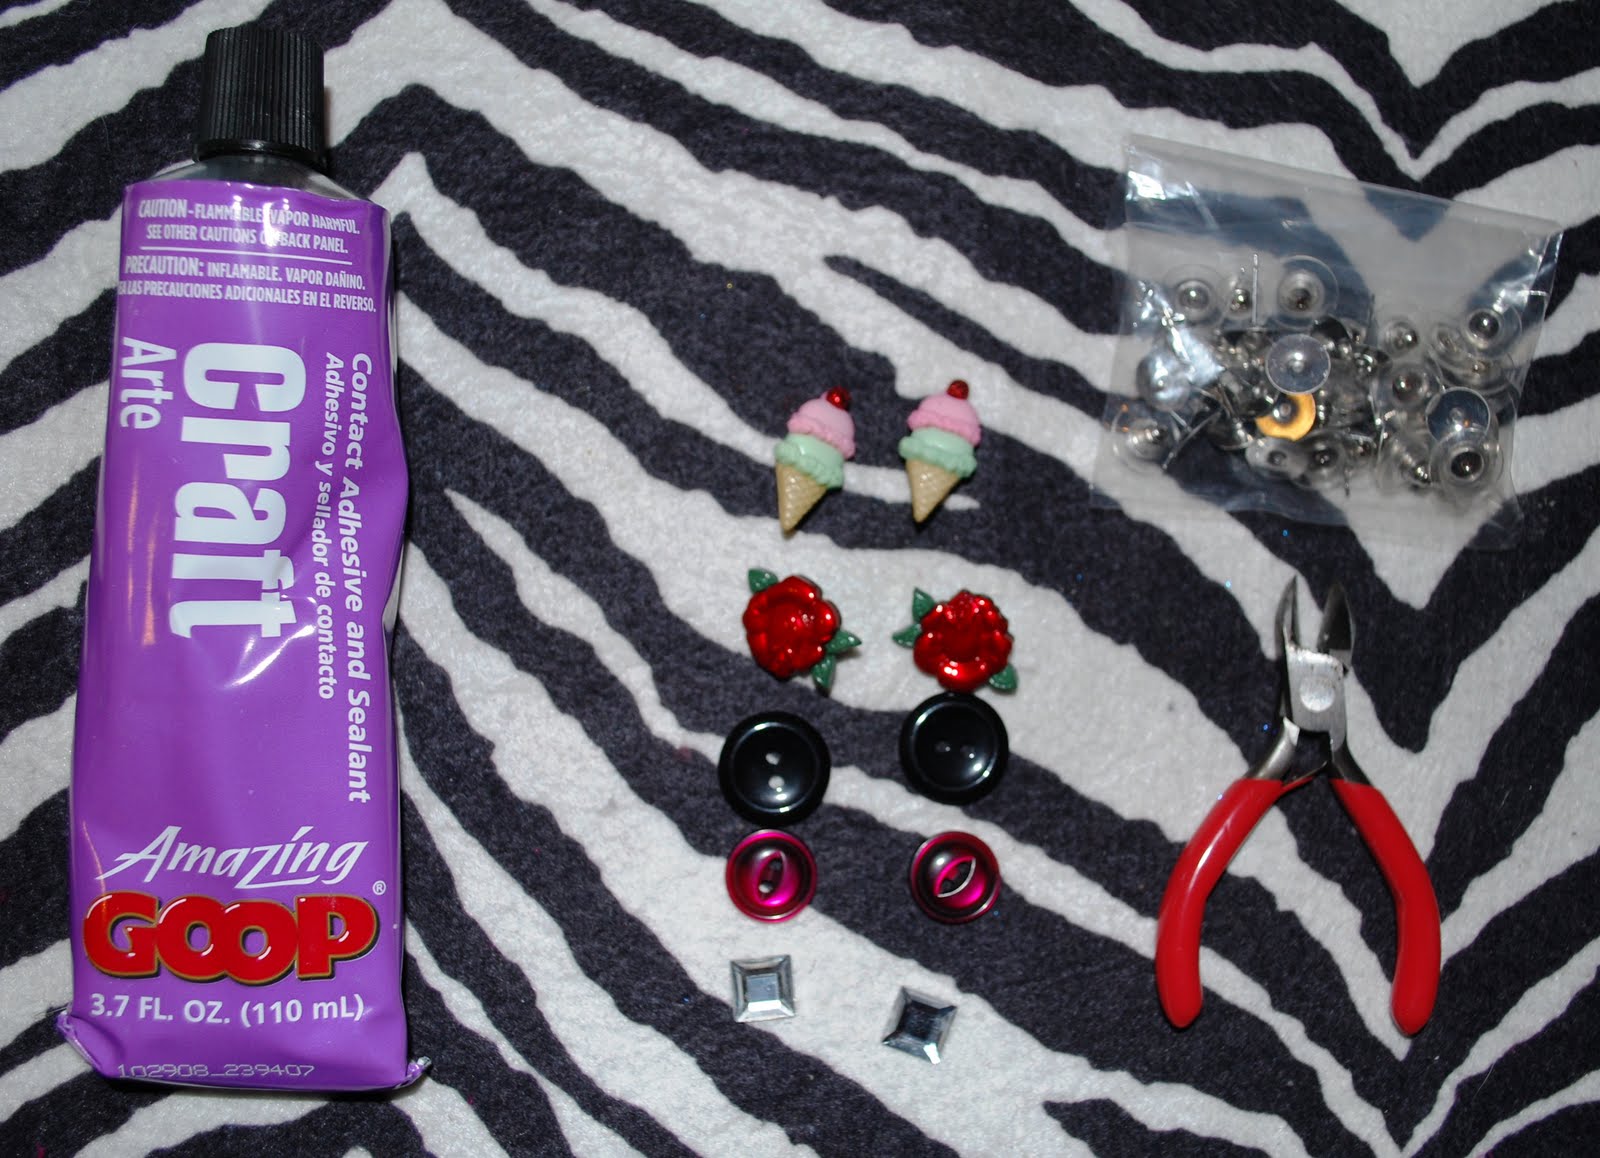
What you will need:

Craft Glue
Buttons
Flat Back Gems(optional)
Flat Back Posts( I found these @ AC Mores)
Jewelry Pliers


At craft stores they have the cutest buttons in so many different shapes, and colors. I thought icecream cone earrings would be fun to have.

Before I could make them earrings I had to remove the button backing.


Last step, is to glue down the post. Let set overnight and in the morning you have a new pair of earrings.

EASY!

-----------------------------------------------------


Next, I found a rose button, but I did not like the leaves. For most of the buttons that have different colors, that are two pieces connected together.


Just simply separate the two layers.


Next remove any connector pieces, and glue on the posts.

Let set overnight.
------------------------------------------------------


I have tons of buttons. I collect them and any time I see a jar of them at a thrift shop, I grab them!

Simply pick two matching buttons, choose which side you want to display and glue the post on the back.

Again, let the glue set overnight.

------------------------------------------------------------


Last take a simple button, add a drop of glue on the front.


Choose any style of flat back gem and press down. Glue the post to the back.

Again, set over night.

----------------------------------------------------------

These four earrings took me less then 20 minutes to make. I think the only reason it took that long was because I was concentrating on watching the latest Doctor Who Episode(which was AWESOME! I didn't see the eye patch lady in this episode. Did any of you? BOWTIES ARE COOL)

Anyway... this is a very simple craft. The only problem I had with it, is that I noticed that the glue I was using crackled the flat back gem I used.  I like the effect, it's just I know for next time I want to use a flat back gem, I need to find a glue that isn't going to do that to my gems... Surprised I hadn't noticed that before.

<3 Zerila

PS- I did it! My waters are taken care of. I have taken to drinking a lot of tea, which helps. Vegetables are good. I had a salad a Panera and oranges for dessert.

Plus I have been doing a 15 minute work out in the morning. A video called, " Walking your Body Flat". I do not like the women's voice, so I turn the video down and listen to my music. It is not that difficult of a work out that I need to hear what she is saying.


Journal With Me 9/19/20

  Journal - Santa Gave it to Me :) Wood Background  Background Paper: Craft Smart, Cedar Lodge Paper Pad, Michaels Fiskars Paper-cutter: JOA...