Showing posts with label Cooking. Show all posts

Friday, April 15, 2011

Blogging Day 237: Geocaching in Minnesota & Maple Syrup

There is not a lot to do in Aiken, Minnesota that is close. Normally, in the land of 10,000 thousand lakes, we would go swimming everyday. But, in the middle of April, with snow coming tomorrow, and ice still on the lakes.....


I decide that, that would not be a good idea. I do not fancy that being a human popsicle is fun, nor am I curious to find out...

Before I begin, you ask, what is Geocaching??

Well, I have a lovely video or you...


I could not do a better introduction then the above video that is on Geocaching's homepage.

They have caches all over the world, even at the pyramids in Egypt!!!!


I'm adding this website to my awesome website list. A very cool website to have in your favorites.

Anyway, this is the cache we found.


 The cache was hidden in a group of birch trees that had logs in between that formed an 'X'.

My mom was the first to point it out stating," I bet it's in there. X marks the spot".

She of course was right... as mothers always are.

Now, as were driving along, my mom noticed these green plastic containers with plastic tubing coming out of trees all along the road.


Weird, huh?
My dad explained that the trees were maple trees and it was getting the sap out of the trees.

FYI-It's alot of work to make maple syrup!! For every 40 gallons of maple syrup you only get 1 gallon of maple syrup!!! ONE!!!!

This is how a manufacture makes maple syrup:


This how they do it at home:


Before watching this video, I didn't think the sap came out in liquid form. Evidently it does at that time of year.

A lot of work to make maple syrup. No wonder it is so expensive in stores.


<3Zerila

Thursday, February 3, 2011

Blogging Day 167 : Chinese New Year Inspired Cupcakes


First things first, I googled how to write Happy New Year in Chinese characters and if I did it wrong at all, I do apologize. I mean no disrespect.

Now, onto the fun stuff! The Chinese New Year Celebration has begun!

Happy New Years Everyone!
We celebrated the New Year at work and I was inspired to create these cupcakes.
Let's Begin!

Items you will need ( the numbers given will give you the above look, numbers can vary based how many people will devour your cupcakes):

Icing: I used Martha Stewart's Buttercream Icing with a tbsp of cinnamon. It added a nice flavor, I could not think of a flavor that was Chinese that would be good for cupcakes. Maybe ginger?
Icing Round Tip
Icing Bag: I used a gallon ziplock bag and honestly, they are a lot easier to use then your normal bag because it allows for more room to stuff the icing in. Just cut off a corner and insert tip.
18 Cupcakes: I used yellow cake.
Hot Water
Icing Spatula
Print out of Happy New Year in Chinese Characters.
14 Fortune Cookie
Black Gel Icing

Let's Being

Step 1:


For some reason I got some crazy looking cupcakes this time around. No worries, as morphed as your cupcakes are, it can always be covered up with icing.


Layout your cupcakes and fill your icing bag with icing.

~~~~~~~~~~~~~~~~~~~~~~~~~~~~~~~~~~~~~~~~~~~~~~~~~~~~

Step 2:


Squirt out icing on top of your cupcake. It does not have to be perfect, just make sure you put enough icing on there.

Once done, place in fridge for about 30 minutes or more, until the icing has harden.

~~~~~~~~~~~~~~~~~~~~~~~~~~~~~~~~~~~~~~~~~~~~~~~~~~~~~~~~~~~~~~~~~~~~

Step 3:


Once the icing has harden, it's time to smooth out the cupcakes. Taking a glass of hot water, dip the icing spatula in the hot water and smooth out the icing. You can grab a paper towel and wipe off any icing you take off, or excess water. The heat will allow you to easily smooth out the icing.

Do not put away the water and the spatula yet!

~~~~~~~~~~~~~~~~~~~~~~~~~~~~~~~~~~~~~~~~~~~~

Step 4:


Now that your cupcakes are all smoothed out, set aside all but four. With the picture of the Chinese characters close, use the black gel icing and write out the characters.

Do not worry if you make a mistake. Using the spatula, scrap off the black icing. You may scrap off a bit of the white icing. If you find you are making to many mistakes on one cupcake, and it looks like your are about to run out of the white icing, grab another cupcake and being again.

The last two characters were the hardest for me.

~~~~~~~~~~~~~~~~~~~~~~~~~~~~~~~~~~~~~~~~~~~~~~~~~~~~~~~~

Last step:


On the rest of the cupcakes place a fortune cookie on top.

Granted, the characters are not perfect, but a fun idea to celebrate a culture's holiday. I encourage everyone to find a city that is celebrating the New Year and check it out. I plan on traveling to DC and watch the festivities there.

Have fun! Remember: Be creative, Be Imaginative and Make it your own!


Veggies/Water: I have been eating ALOT of oranges lately! I have one for breakfast, lunch and snack. Very yummy!

Oh, I finally added a picture of myself in my profile! I was having a lot of fun with my computer's camera program.

OH!!! Big announcement! My Grandpa is getting married!!! Congratulations Grandpa!!

<3 Zerila

Thursday, December 2, 2010

Blogging Day 106: Ketchup Carrot Cookies


You read it right! Ketchup Carrot Cookies! YUMMY IN ONES TUMMY!

Do you have a slight addiction to the red stuff? Do you only eat french fries as instruments to get the ketchup in your body? Does the sight of an empty ketchup bottle fill you with dread? Have you seriously considered getting that t-shirt that says "I put Ketchup on my Ketchup"?

These are the perfect cookies for you!

Now, for those you answered no to all of the above questions. First, weirdo... Secondly, the ketchup adds a nice molasses spice kick to a classic recipe. Do not fear the ketchup, embrace the ketchup.

Unfortunately, this is not my recipe. This recipe and many other ketchup filled  creations can be found at:


I found this recipe when we had a 'Most Unique Ingredient' contest at work. When people found out what I placed in the cookies, they were flabbergasted because they tasted so good. People request me to make them all the time.

Now,if your still not convinced that this is a definite cookie to make, I think you should just still make them to share with others. Watching peoples' faces when you tell them that you put ketchup in their cookies! The most fun you will have all month. 

Torturing co-workers... ahhh the joys of life.

<3 Zerila


Wednesday, December 1, 2010

Blogging Day 105: Breaded Pork Loin with Mustard


I am a huge fan of breaded meat. Unforunately, most of the time it involves frying in oil, which just adds more fat.  Instead of using oil, this recipes says to rub the meat with mustard.  I used regular mustard, but I'm sure dijon, honey mustard, or any kind well do.


Alright, let's begin!


Ingredients:

Pork Loin
1/3c. mustard
3/4c. Italian bread crumbs
Wax paper (optional)


First, preheat oven to 400 degrees.

I set my meat up on a wax paper sheet, because this is going to get pretty messy. The wax paper is going to make it very easy to move around.

~~~~~~~~


I am not going to lie to you, this is the messiest part. Basically your are going to need to rub the whole pork loin with mustard. You probably could use a sauce brush, but the fastest way is to use your hands. Do not worry, you can always wash it off when your done.

Once done with spreading the mustard everywhere, pick-up and set the pork loin aside. Using, the wax paper pick-up securely by the corners.
~~~~~~~~


With a clean sheet of wax paper, spread out your bread crumbs.

~~~~~~~~


Drop the pork loin in the bread crumbs and proceed to cover the entire pork loin with crumbs.

~~~~~~~~


Once done, cook the pork loin for 30-45minutes. The pork loin is not done until the middle reaches 160 degrees, before that and you might have "extra" flavoring in your meat.
~~~~~~~~


Once the pork loin has reached the desired temperature, slice and serve.

I served this to my family and got a 4 out of 5 stars in yumminess.

~~~~~~~~

Now, seeing this as an awesome and less fattening way to add bread crumbs to food, I tried this on our veggies.


A good idea, but unfortunately, the bread crumbs did not stick and flavoring did not go very well. From my family it was given 2 out of 5 stars. An experiment, that unfortunately did not play out well, but maybe next time.

Have fun! Remember: Be creative, Be Imaginative and Make it your own!

<3 Zerila


Thursday, November 4, 2010

Blogging Day 78: Yummy Artichokes


http://www.oceanmist.com/products/artichokes/artichokeanatomy.aspx

I was curious one day about how to cook artichokes.  When I go out to eat, I would always look for foods with artichokes in them.  I would also grab a jar of artichoke hearts as a treat anytime I was made to suffer by going to the grocery store right after church. Everyone and their mother are in the store right at that time.

By the way, the perfect time to go grocery shopping is at 10 pm. I used to work late hours and would go to the grocery store right after work and no one is there! I had the whole store to myself! If you have ever had the urge to go all Fast and Furious with your grocery cart, 10pm grocery shopping is for you! Vin Diesel eat your heart out!

:D

Now that I am trying to eat healthier (Which by the way, does anyone feel the irony, that after a blog about cupcakes, I start talking about eating healthy? Yeah, me too.) I wanted to learn how to cook fresh artichokes. 

My first tool, for whenever I want to learn something new, is always YouTube. If you want to learn something, someone in this crazy world has created a video how to do it. After watching the video below, I was drooling and ready to devour artichokes.

Is it the best video? I don't know, but he was incredibly helpful in showing all the steps on how to simply boil an artichoke. Plus, his mustard and olive oil combination was yummy in ones tummy! Artichokes have definately become part of my weekly diet.

I want to challenge you readers. In the fight to walk away from junk food, find a food that you have always been curious to try and try it. Not sure how? The internet has a wealth of knowledge and if you need something visual, like I do, try YouTube.

I always make a point of trying food once. Of course, I might be gagging a second later, but I at least I tried it. This is coming from the girl who had to try all the nasty Harry Potter Bertie Bott's jelly beans. Must admit, ear wax flavored jelly beans has a very distinct taste. No judging, right?

 Have fun!


<3 Zerila

Blogging Day 77: Zombie Cupcakes


This past Friday for work, we had a Halloween party, and I decided to dress up as a zombie. We also had a to bring a side dish or dessert, and my first thought was to make vampire cupcakes. I had made them for a friend, who was a fan of True Blood, for her birthday a couple months back.


They are basically vanilla cupcakes with cherry filling. I found them extremely cute and tasty. 


I thought dressing up as a zombie and bringing vampire cupcakes was a bit of cross branding. You know when you Chanel sunglasses while carrying a Prada bag. Very no-no. ( Of course I do it all the time, but do as I say not as I do. ) My point is,I decided to be a little inventive and create the ' ZOMBIE CUPCAKE'. 

I named it myself. I am so proud of my little zombies.  Sometimes I find my awesomeness to be to much, don't you? Alas, its a burden we must all endure.

Ingredients you will need:

Vanilla/Yellow/White Cupcake Mix( already mixed together)
Green Food Coloring
Cupcake Cups
Can of Cherry Pie filling
Chocolate Powder
2 Pastry bags
Icing Tips
Chop Stick

First drop about three drops of green dye into your already mixed together cake mix. 

I am using a Kitchen Aid, but any mixer will do. Even if it's the old fashion, stone age tool, the spoon. Keep adding three drops at a time until you get the desired green color that YOU want.


Line your cupcake pan with the cupcake cups and cook them according to the cake box instructions. Or if you are hard core, your own recipe.  I have yet to master the cake, my cake's always come out bland and tasteless, but one day I will achieve my goal of making a delicious cake by hand.


Now that you have all the cupcakes baked. Set them aside to cool down.

REMEMBER: DO NOT walk away and leave your cupcakes unprotected. Your family members need only one minute alone with your cupcakes to cupcake-nap them.


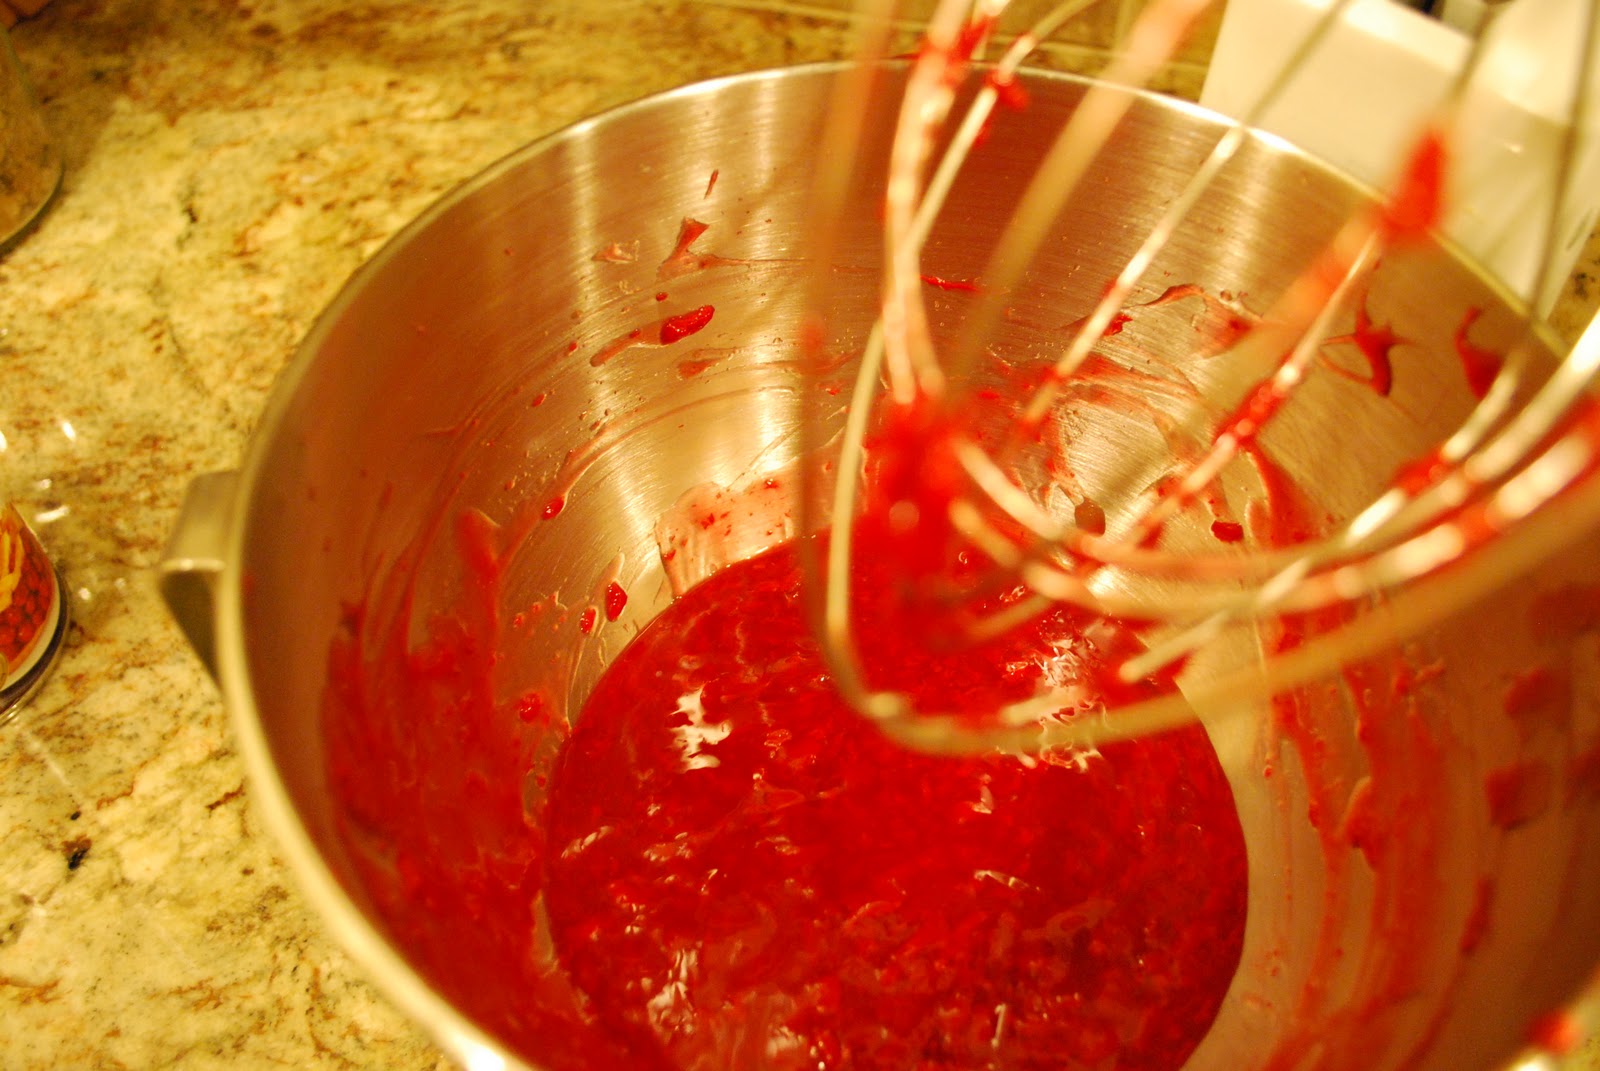
 Next you need to puree the cherry pie filling. Again, I used the Kitchen Aid, but any way you can get those cherries pureed is good.


After your cupcakes are cooled down, cut a triangle shaped hole in your cupcake. Set aside the cut out top.


Take your pureed cherry pie filling and fill one of the pastry bags. Fill up the holes in your cupcakes with the filling.


Now, take the piece that was cut out and remove the access cake, so that all you have left is the crust and cover up the filling.


Set the cupcakes aside, and now work on the icing.

Again, add three drops of food coloring, mix and continue until you have the desired green color.


Using a plain circle tip at the end of the pastry bag, fill up the bag with the lovely green icing. Ice the cupcakes until you have a nice layer of icing.


Place your cupcakes in the fridge for about 15-30mins, so the icing will set.
After the icing has hardened, remove from fridge.
To smooth out the icing you will need an icing spatula and a cup of hot water.


Using the heated spatula, smooth out the icing. I find it easier when the icing is set because I do not move all the icing, just the top layer.


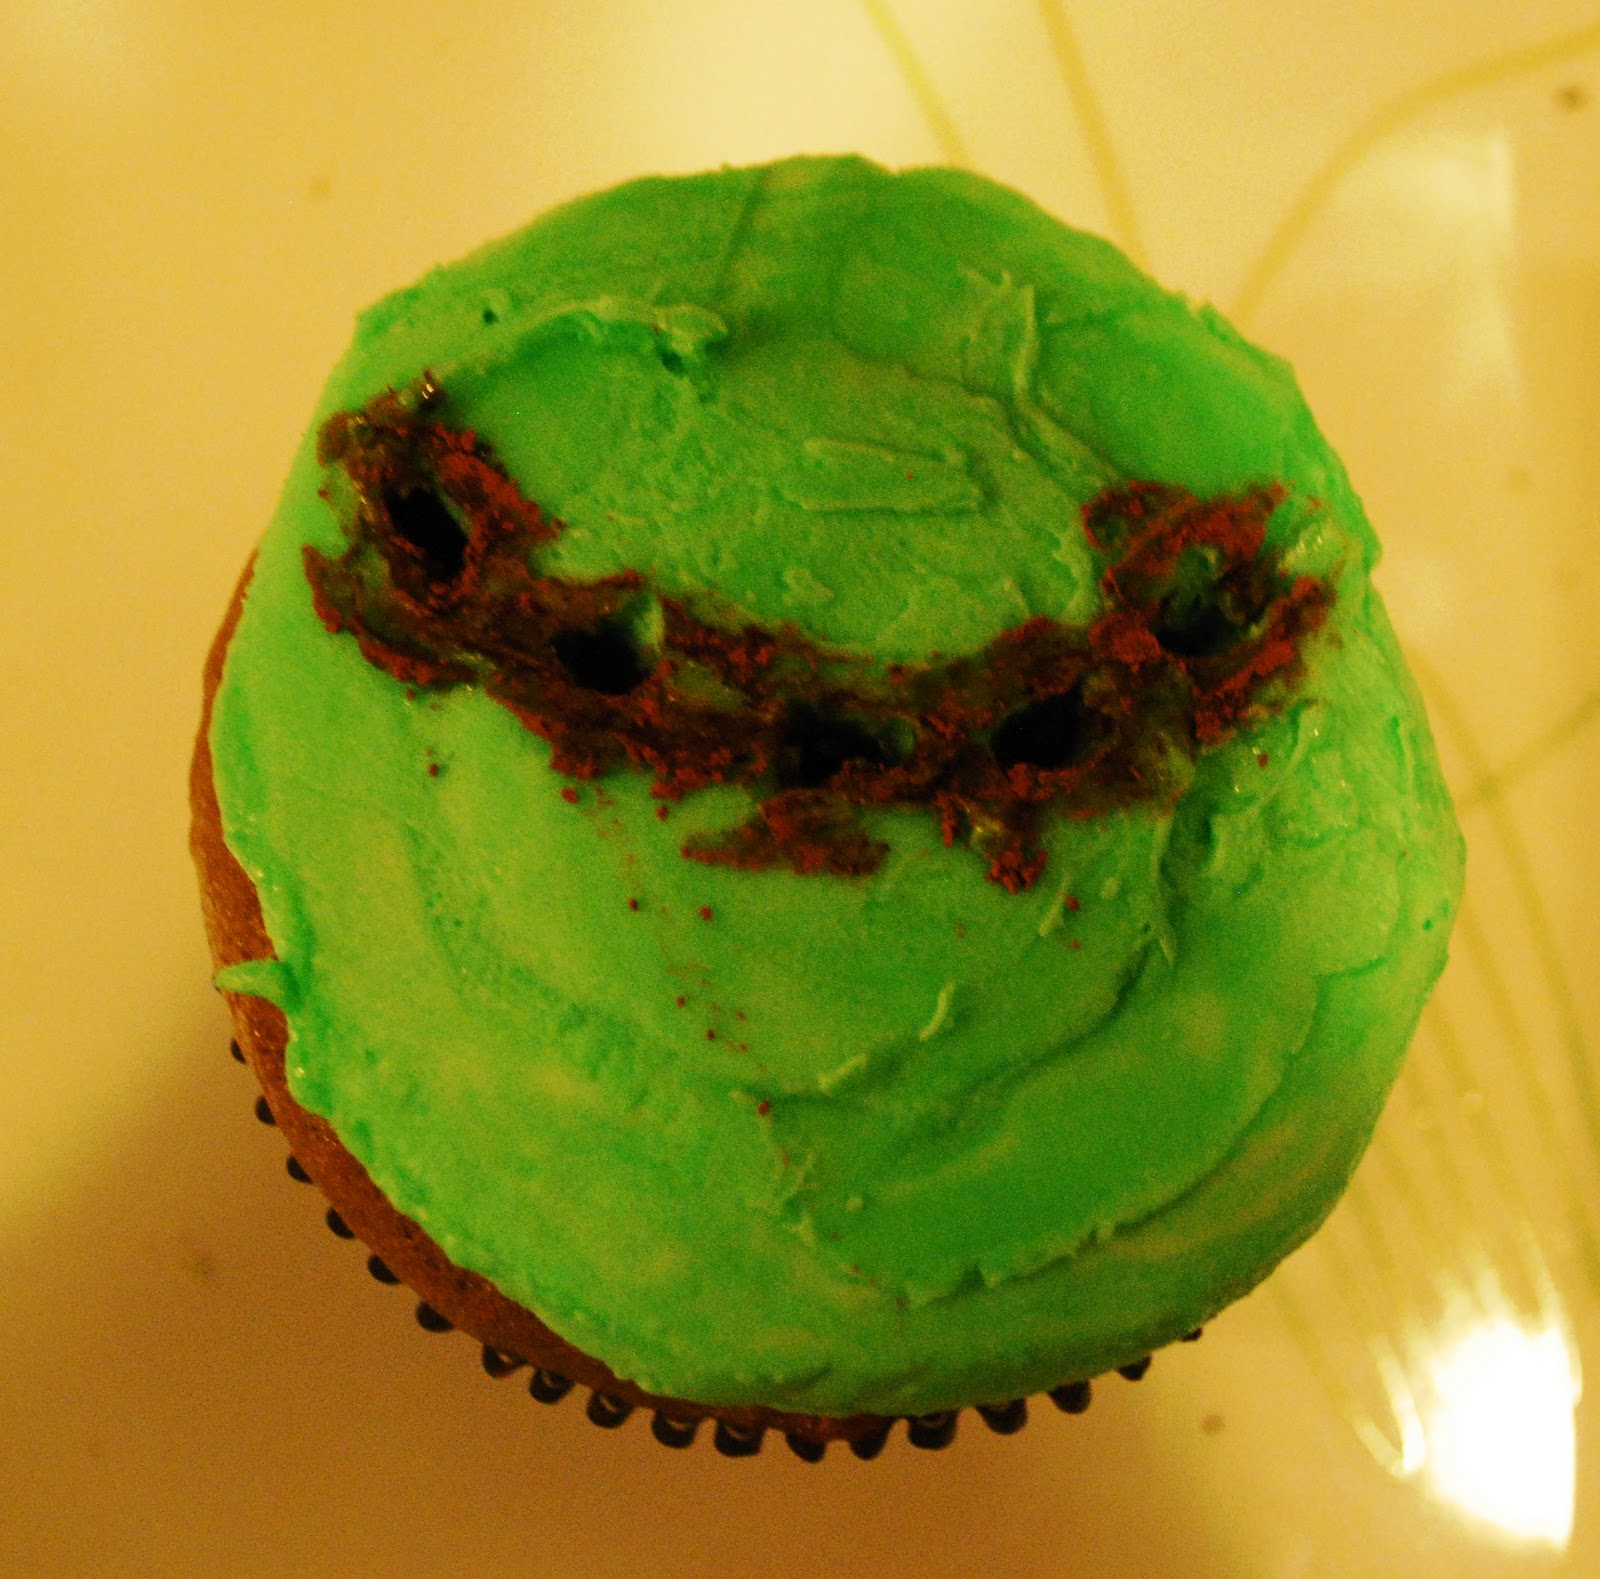
Now with the chopstick you are going to make impressions that look like teeth. It took me awhile to get the hang of it, but after a while I got pretty good. Amazing, the kind of skills you will acquire if you try.

Taking the chocolate powder, sprinkle around the teeth marks to get the desired rotted out bite look. You can also wet the end of the chopstick and pat the chocolate powder onto the teeth marks. I did both, it all depends what you find easier.


Now, for the last step, take your left over pureed cherry filling and add the blood marks. Again, practice makes perfect.


ALL DONE!

Perfect for Halloweens parties, horror movie night, zombie movie premieres, all night marathons of Resident Evil 4, or in celebration of the new show 'The Walking Dead'( Trailer Below).

Have fun! Remember: Be Creative, Be Imaginative and Make it your own!

<3 Zerila


Journal With Me 9/19/20

  Journal - Santa Gave it to Me :) Wood Background  Background Paper: Craft Smart, Cedar Lodge Paper Pad, Michaels Fiskars Paper-cutter: JOA...